 115
115
Preparing Your Subjects File
GETTING A TEMPLATE FILE
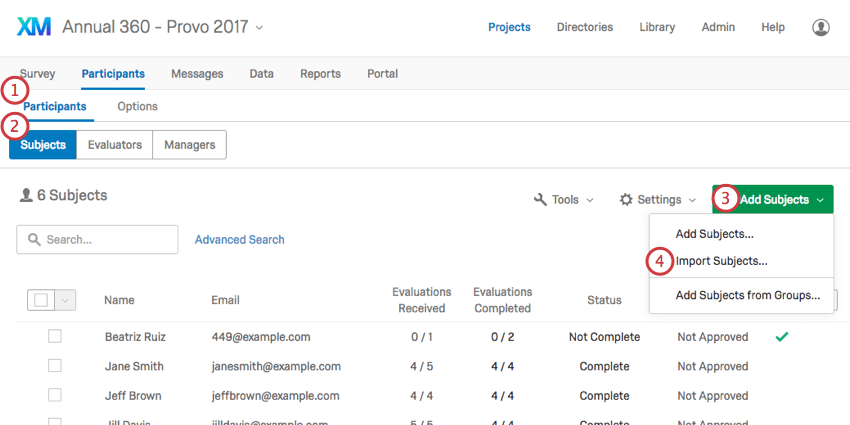
- Go to the Participants section of the Participants tab.

- Make sure you are in the Subjects subsection.
- Click Add Subjects.
- Select Import Subjects.
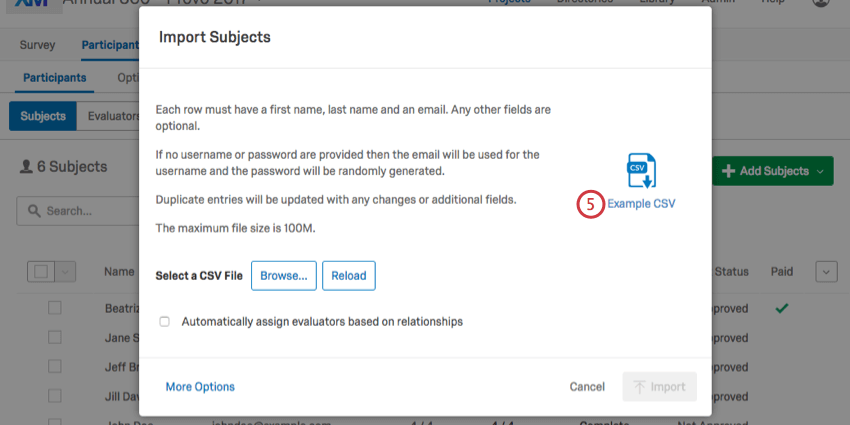
- Click Example CSV to download a template file.

PREPARING THE FILE
- Keep your header row! The only thing you should change in the header are Metadata 1 and Metadata 2. Instead of these headers, feel free to add any metadata you want, such as Office, Location, Department, and more.
- Every row is a separate subject.
- Every subject needs a first name, last name, email, and a unique identifier (such as an employee ID). The email will later serve as their login ID.
- When you save the file, keep it as a CSV or TSV.
- Add as many rows of subjects as you need. Your max file size is 100M
Attention: If this file has a UniqueIdentifier column, please see the Unique Identifiers page for additional instructions.
Qtip: If your license has SSO, make sure you upload your participants to the directory with their usernames before you upload participants! Once someone’s in the directory, you can upload them directly into the project without including the UserName column.
Preparing Your Evaluators File
Warning: Do not complete this section until you’ve uploaded your subjects!
Qtip: If your license has SSO, make sure you upload your participants to the directory with their usernames before you upload participants! Once someone’s in the directory, you can upload them directly into the project without including the UserName column.
GETTING A TEMPLATE FILE
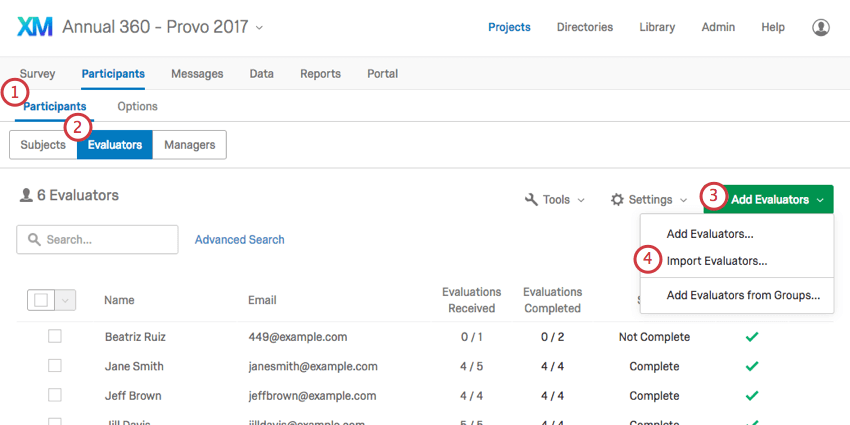
- Go to the Participants section of the Participants tab.

- Make sure you are in the Evaluators subsection.
- Click Add Evaluators.
- Select Import Evaluators.
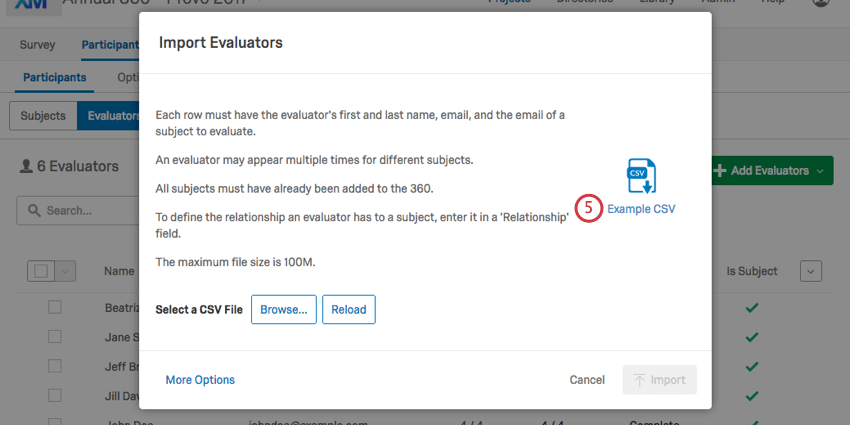
- Click Example CSV to download a template file.

PREPARING THE FILE
- Keep your header row! The only thing you should change are Metadata 1 and Metadata 2. Instead of these headers, feel free to add any metadata you want, such as Office, Location, Department, and more.
- Every row is a separate subject-evaluator relationship. For example, let’s say you want to add 2 evaluators for Jane Smith and 3 evaluators for John Doe. Even if some of these evaluators are the same people, you will fill out 5 new rows.
- The FirstName and LastName columns are for the evaluator. These columns should reference the same person whose email is in the Evaluator Email column and whose unique identifier is in the EvaluatorUniqueIdentifier column.
- The SubjectUniqueIdentifier column should match each UniqueIdentifier you designated when you prepared the subject file.
- The Relationship column refers to the relationship of the evaluator to the subject. For example, if John Doe is Jane Smith’s manager, and John Doe is the evaluator, the Relationship should say Manager. If Jane Smith is evaluating John Doe, the Relationship should say DirectReport.
- The metadata columns are for the evaluator. Try to keep rows where the evaluator recurs consistent.
- When you save the file, keep it as a CSV or TSV.
- Add as many rows of relationships as you need. Your max file size is 100M.


