 121
121
Adding Subjects and Evaluators Manually
Qtip: If your license has SSO, make sure you upload your participants to the directory with their usernames before you upload participants! Once someone’s in the directory, you can upload them directly into the project without including the UserName column.
When you manually add subjects or evaluators, you must fill out the same columns as the ones in the CSVs described above.
To add participants manually:
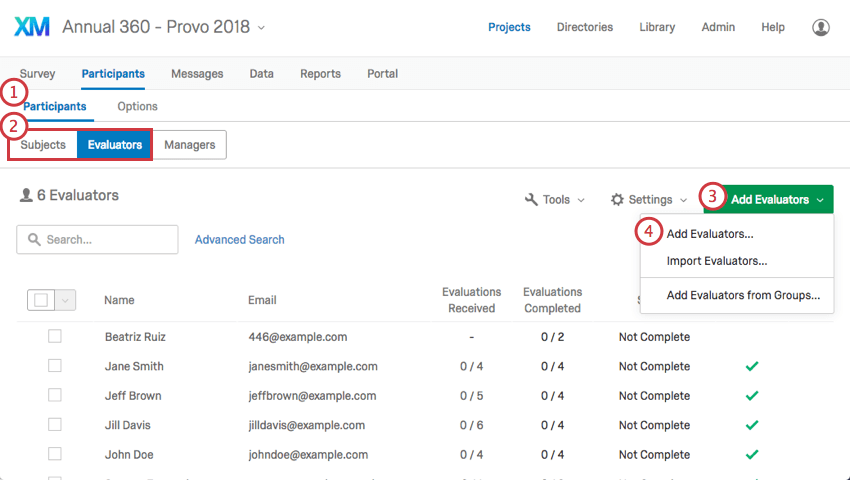
- Navigate to the Participants section of the Participants tab.
- Make sure you are in the correct subsection. Subjects MUST be uploaded under the Subject subsection, and evaluators MUST be uploaded under the Evaluators subsection.
- Click Add Subjects/Evaluators.
- Select Add Subjects/Evaluators.
ADDING SUBJECTS
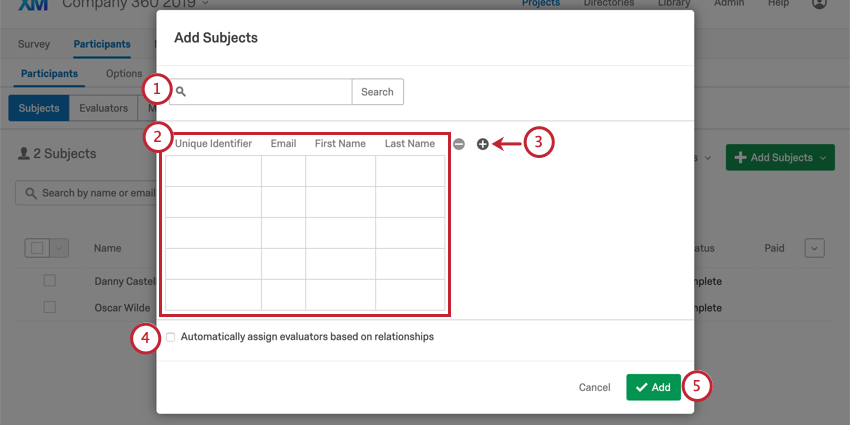
- For members that exist in your directory, you can use the search bar at the top. Type in a name and click the user to add them.
- Each row is a new subject. Fill out all the columns.
- Click the plus sign ( + ) to add a new metadata column.
- If you have participants already saved in your directory, you can assign them evaluators based on who’s already listed in their directory relationships. Just select Automatically assign evaluators based on relationships and select the eligible relationship types.
- When you are all done, click Add.
Attention: If this window has a Unique Identifier column, please see the Unique Identifiers page for additional instructions.
ADDING EVALUATORS
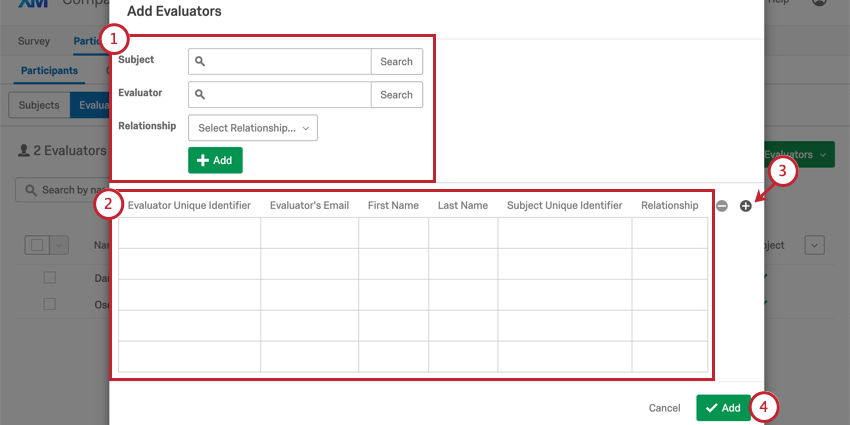
- For members that exist in your directory, you can use the search bar at the top. Search for the Subject and the Evaluator, assign them a relationship, then click Add.
- Each row is a new subject-evaluator relationship. Fill out all the columns.
- Click the plus sign ( + ) to add a new metadata column.
- When you are all done, click Add.
Attention: If this window has an Evaluator Unique Identifier column or a Subject Unique Identifier column, please see the Unique Identifiers page for additional instructions.


